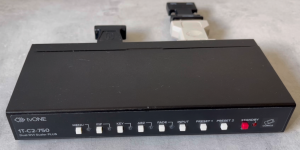
Specifically the 1T-C2-750 model
Setup required: Custom timings via a PC and RS232 cable (technically not required but highly recommended). 480i is already a default output resolution called ‘NTSC’ and ‘PAL’. Image resizing is cumbersome and will take time to fine tune.
Cost and availability: Available second-hand, relatively affordable
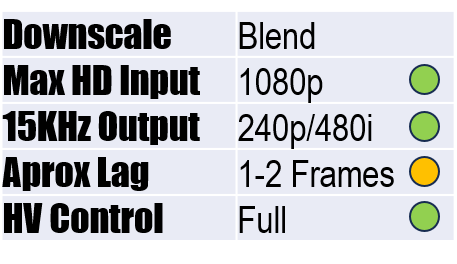
TvONE’s are synonymous in downscaling with the patented software they’re built on: Corio2. Several models are capable of outputting 240p and 480i, which Dochartaigh eloquently listed in his tutorial on Shmups
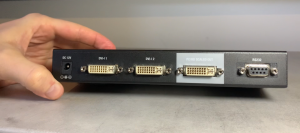
These scalers come recommended for their price, relative availability, and the ability to input and output all common resolutions via DVI. Unlike line-decimating downscalers, a Corio2’s smoothly blended output has the big advantage of displaying all manner of resolutions with very little jaggies and shimmer. The softness of the video output is only relative to other scalers, and on its own they are far from soft. Unfortunately, they have roughly 2 frames of lag, require some setup with an RS232 cable to interface with the PC software, and image controls are extremely cumbersome to navigate. But once all resolution scenarios are optimized and saved to their own preset, downscaling is fairly seamless. Here’s some tips:
- Reset all the Corio settings for a fresh start. Rename resolutions as their input to output via the Corio Tool Suite (example, 1080p to 480i)
- Adjust Source settings first using the highest resolution input, as this global adjustment transcends to all other resolutions and presets. If downscaling line doubled/tripled 240p content, display the 240p test suite horizontal stripe pattern while adjusting. My Sources TL settings are 20 (H) and -1 (V), BR is 0 and 0. Then save startup settings so it will always recall
- Optimize the HV start and position for each Resolution. If downscaling integer content, only adjust V size with the same test pattern as step 2, but it would be best to not alter this. If necessary, fine tune HV in the Window menu. I have Aspect set to Pixel and H V shift is 0 as I prefer to make adjustments only to the Resolution
- Save to one of the 10 presets. There’s technically 3 ‘easy to access’ presets; 1 on boot up, and the other 2 as the physical preset buttons, so favor these 3 for your preferred scenarios
Overcoming the setup, image resizing/positioning and lag, these are highly recommended scalers for complete resolution handling.
Verdict: Recommended